Wednesday, February 27, 2013

Cauliflower Crust Pizza

The Cauliflower Crust Healthy Pizza Recipe 


ingredients:

1 cup cooked, riced cauliflower
1 cup shredded mozzarella cheese (low-fat, no fat)
1 egg, beaten
1 tsp dried oregano
1/2 tsp crushed garlic
1/2 tsp garlic salt
olive oil (optional)
pizza sauce, shredded cheese and your choice of toppings*

Medifast ingredients:

1 cup cooked, riced cauliflower
1 oz shredded mozzarella cheese (low-fat, no fat)
1 egg, beaten
1 tsp dried oregano
1/2 tsp crushed garlic
1/2 tsp garlic salt
olive oil (optional)
2 Tbsp pizza sauce
2 oz shredded cheese
2 cup green* toppings
This counts as one Medifast Lean and Green meal; however, if you choose no extra topping you will need to prepare two extra servings of your green option later on in the day.

to "rice" the cauliflower:


Take 1 large head of fresh cauliflower, remove stems and leaves, and chop the florets into chunks. Add to food processor and pulse until it looks like grain. Do not over-do pulse or you will puree it. (If you don't have a food processor, you can grate the whole head with a cheese grater).


Place the riced cauliflower into a microwave safe bowl and microwave for 8 minutes (some microwaves are more powerful than others, so you may need to reduce this cooking time). There is no need to add water, as the natural moisture in the cauliflower is enough to cook itself.

One large head should produce approximately 3 cups of riced cauliflower. The remainder can be used to make additional pizza crusts immediately, or can be stored in the refrigerator for up to one week.

To Make the pizza crust:


Preheat oven to 450 degrees. Spray a cookie sheet with non-stick cooking spray.

In a medium bowl, stir together 1 cup cauliflower, egg and mozzarella. 


Add oregano, crushed garlic and garlic salt, stir. 


Transfer to the cookie sheet, and using your hands, pat out into a 9" round.
Optional: Brush olive oil over top of mixture to help with browning.
(I let it cook for five minutes before I brushed olive oil on it)


Bake at 450 degrees for 15 minutes, or until golden brown (took me about 20 mins).

Remove from oven.


To the crust, add sauce, toppings and cheese. Place under a broiler at high heat just until cheese is melted (approximately 3-4 minutes).

Enjoy! Everyone will want a piece!
*Note that toppings need to be precooked since you are only broiling for a few minutes.
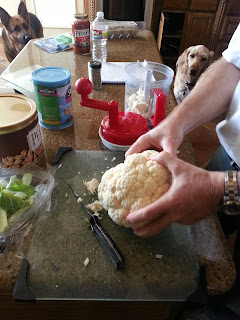

dads non-medifast pizza:


SHARE:

Tuesday, February 26, 2013

Garlic Teriyaki Shrimp Recipe

Garlic Teriyaki Shrimp Recipe


Ingredients: 

- 7oz Shrimp (weigh out with Food Scale)
- 1 Zucchini
- 2 Cups of Shredded Cabbage (Coleslaw was substituted)*
- 1 Teaspoon of Simply Asia Sauce (can be substituted)
- 2 Tablespoons of Extra Virgin Olive Oil
- Pam Original
- 1.5 Teaspoons of Garlic
- Dash of Salt & Pepper

Firstly you're going to spray a cooking pan for five seconds with Pam Original. Turn the stove to medium heat if you still have to deshell the shrimp. If you've already deshelled the shrimp turn the stove to high. It will begito cook and turn brown in three to four minutes (depending how powerful your stove is). You're going to stir around the coleslaw* until it browns.


Once the coleslaw* is brown remove it and place it on a plate or into a bowl. However you like to enjoy your meals.

Now you're going to respray the pan with Pam for five seconds. Then you're going to place your Zucchini in it. I cut my Zucchini up into fours so it's easier to cook, and this also helps make sure every piece gets a bit of flavor. You can pinch a little salt and pepper here if you like. Cook it like you did with the coleslaw and wait until it browns. 
This will smell delicious. 


When the browning is complete place Zucchini on top of your cooked coleslaw. This is three servings of Vegetables. Yum!


Next we move on to the shrimp. Place two tablespoons of Extra Virgin Olive Oil into a pan. Turn on the heat. This can be placed between medium and hot. The temperature really depends on how fast you want to cook your shrimp. You'll place your shrimp inside the pan.


Wait a few minutes until you start hearing the sizzling sound of the shrimp cooking. The shrimp will turn a pinkish orange. Wait a minute of two before flipping.


You need to be careful here while flipping your shrimp. If the stove is too hot the oil will burst and could burn you when flipping the shrimp. Flip the shrimp with caution.


I like my shrimp a little bit with a soft crunch so I'll leave them on the stove a minute or two longer. You'll notice when they become slight crunchy because they'll start sticking to the pan. 


Once you have achieved your crunchy level you'll place your 1.5 teaspoon worth of garlic into the pan with the shrimp. Let it sit for thirty seconds before you begin to stir it around with your shrimp. This will make the garlic flavor stick out through the sauce.


One your garlic has browned slightly around the shrimp it's time to add the sauce. I cook mine with the Simply Asia Sauce from Kroger because to me the sauce just has a kick in flavor. You're going to add 1 Teaspoon. I didn't measure this out so mine will have a little bit more in the picture then what you'll see.


You stir the sauce continuously for at least a minute before you place the shrimp on top of your zucchini and coleslaw. The best thing to do is pick up the pan and scoop it all out onto your plate or bowl.


Ta da! You've made a delicious,healthy, fulling meal.


Now it's time to do the most important part - EAT! This meal is best served and eaten hot. Don't let it sit out or the overall flavor will flatten out.


Since you'll have left over sauce, unless you made this meal for your entire family, be sure to place it in a small sandwich bag. Tighten it so no air can come in or out. Then place in your refrigerator.  If you used another sauce then do the same thing with it, unless it's in a bottle. Then just place the lid back on top, and save it for another time or recipe. 
SHARE:

Windy .55 Walk

SHARE:
Blogger Template by pipdig